


Document Actions
How do I install my MachFive 2 upgrade authorization onto my iLok?
When upgrading from MachFive version 1 to version 2, your new authorization comes on a license card. The authorization needs to be transferred to your iLok by following these steps:
- Insert the iLok to which you wish to transfer your MachFive 2 authorization.
- If MachFive is currently running on your computer, either standalone or in a host application, quit MachFive or the host application (so that MachFive is no longer running).
- Launch or relaunch MachFive (or your host application).
- During launch, you should see the window shown below:

- Click authorize.
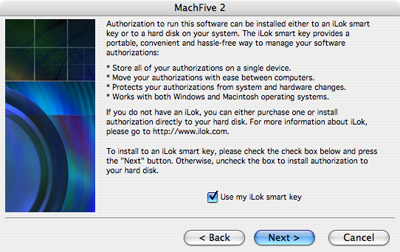
- When you see the dialog shown below, check the Use my iLok smart key option and click Next:
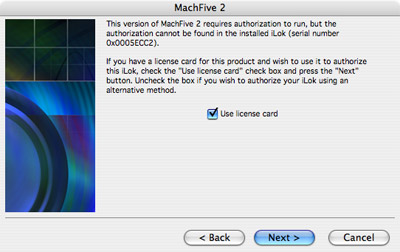
- When you see the dialog shown below, check the Use the license card option and click Next:
- You'll now see a window prompting you to insert the license card.
- Remove the license chip card from the license card by gently snapping the three tabs, taking care not to bend the chip itself.
- In this next step, do not remove the iLok from the computer's USB port; be sure to leave it plugged in. Leaving the iLok inserts in the computer's USB port, gently insert the license chip inot the slot at the end of the iLok, with the circuit facing the top of the circuit board inside the iLok itself. The side of the iLok with a circuit board, LED, and a few chips on it is the top.
- Be sure to push the license chip in all the way.
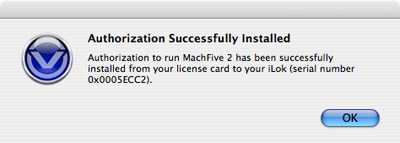
- If the license chip is inserted correctly as described above, you should now see confirmation that the authorization has been successfully transferred to the iLok, as shown below; click OK:
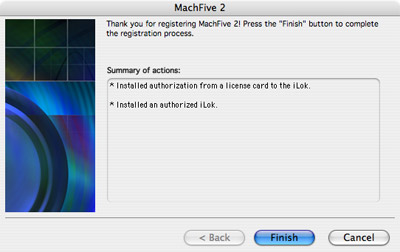
- You'll now see the window below; click Finish:
- MachFive 2 is now authorized on this iLok.


