


Document Actions
Tech Tips | DP8 | Replace Soundbites

Replace Soundbites in DP8
The “Replace Soundbite” command allows you to replace any soundbite currently loaded in your DP sequence with another audio file on your hard drive. You can replace a soundbite with a full audio file, or just a region of that audio file (what DP would call a "Soundbite"), even if the audio file or region isn't already loaded in your project’s Audio Files folder.
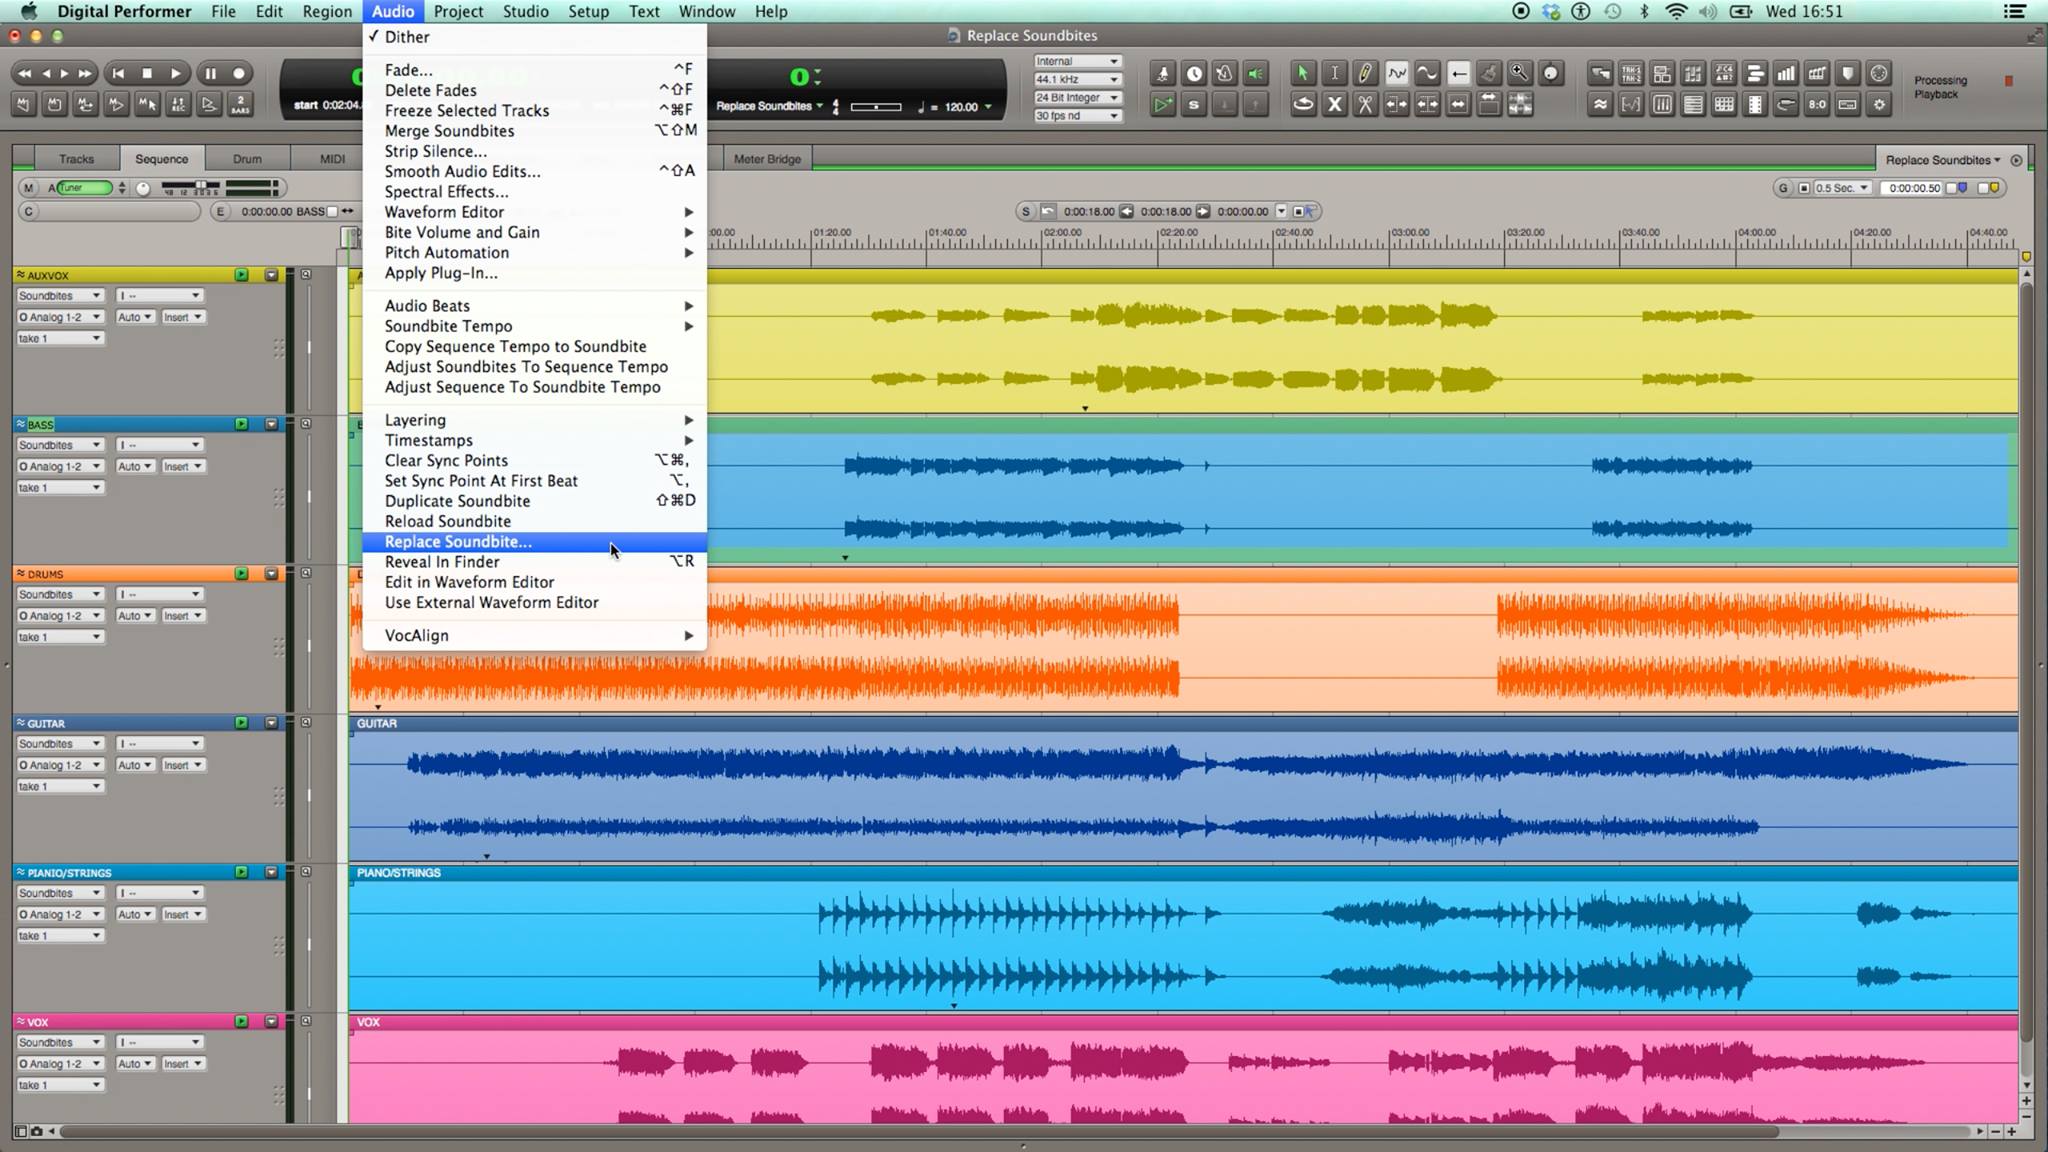
To quickly replace a soundbite, highlight a soundbite in the Sequence Editor or Tracks Window, and reach for “Replace Soundbite”, found under the Audio drop-down menu.
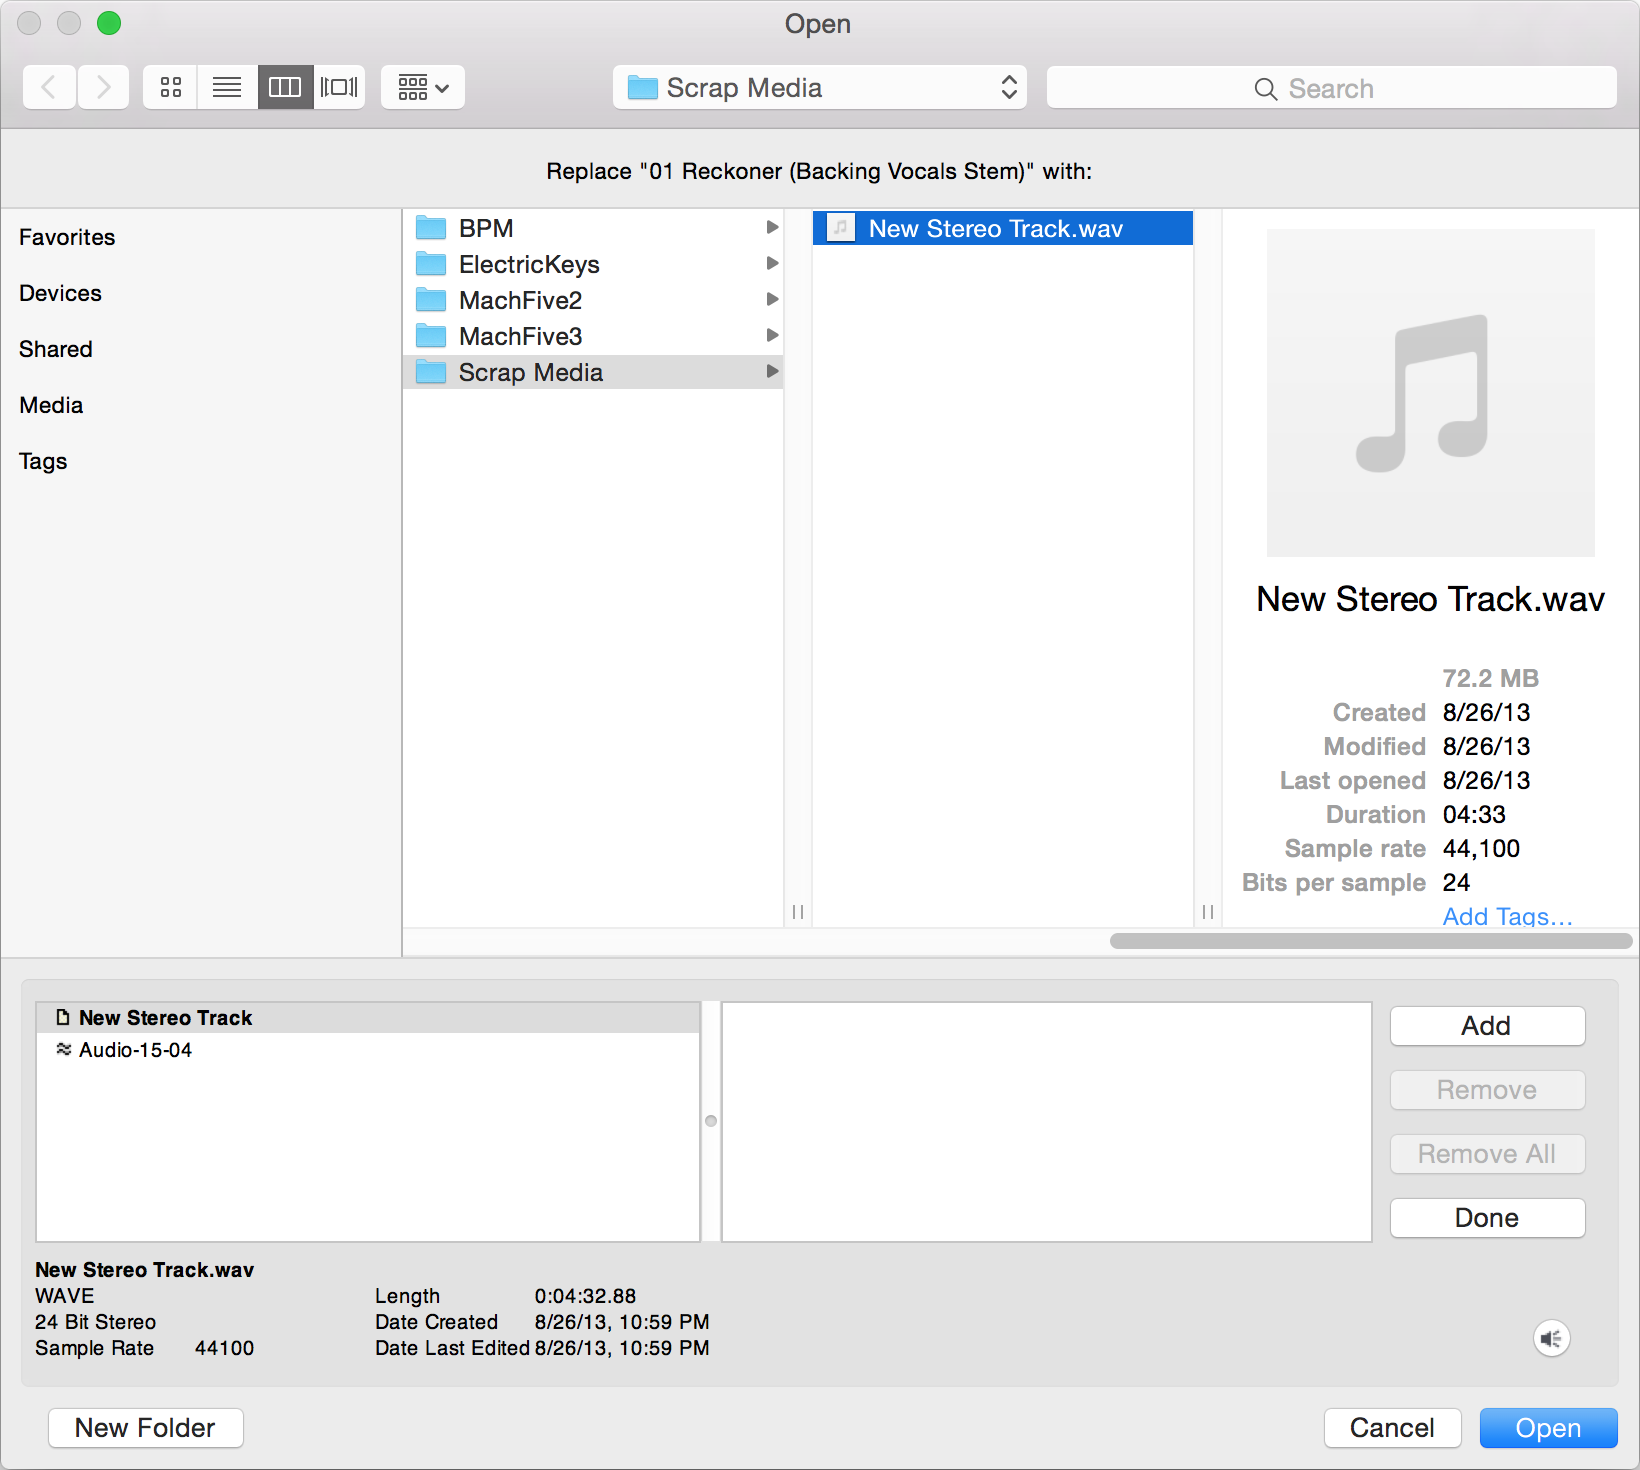
The window that appears provides you a few different options for completing the Replace Soundbite process. Use the browser to navigate through your hard drive and find the audio file you want to use. From here, there are two options for replacing the soundbite:
-
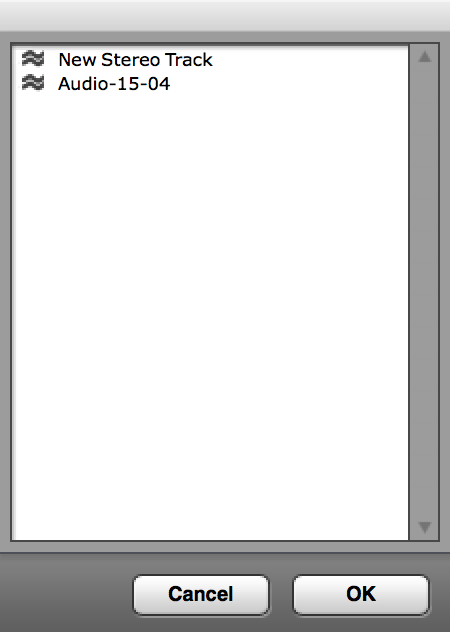
Highlight an audio file and click Open: By simply highlighting the audio file and clicking Open, you will be prompted with a pop-up window. This window will list the full, parent audio file first, followed by any embedded regions of that audio file, referred to as soundbites. Their format, as in mono vs. stereo, is expressed by a single or double tilda in the pop-up window.
Note: DP won't let you get this far if you tried to replace a stereo soundbite with a mono audio file or, vice versa (or else you'd get an error like this), so any of the listed soundbites can be used.
Select either the entire audio file, or one of the soundbites, and click OK. -
Highlight audio file and click Add: The same process can be done by highlighting an audio file in the Open window's browser, and looking at the second set of windows at the bottom. The same parent file and embedded soundbites are listed in the small window on the left. The parent audio file is identified by the page icon, and any included soundbites are identified as mono or stereo by a tilda or double-tilda symbol. Of course, be sure you are replacing stereo files with stereo files, and mono with mono, etc.
Highlight which you'd like to use, and click Add so it appears in the window on the Right, then click Open.
In either case, once clicking Open, the originally selected soundbite in your DP sequence will be replaced by whichever audio file you chose in the Open window. The new soundbite will be placed in the exact starting location as the original.
Often, instead of replacing soundbites one at a time, it is common to need to replace all instances of a single soundbite loaded in your project. Highlight the soundbite in the Soundbites Window, and choose “Replace Soundbites” from the Audio drop-down menu. This technique replaces all instances of the original soundbite, with the one chosen.
Note: Be sure to take note of the relationship between the length (time) of the original soundbite, with that of the audio file you are using for replacement. The beginning of the new soundbite will be placed at the same location as the beginning of the original soundbite, however if their lengths differ, check to make sure the new soundbite fits appropriately alongside other soundbites on that audio track. If you are replacing a shorter soundbite with a longer soundbite, the new soundbite may overlap the next soundbite (in terms of time) on this audio track.
Another “Replace” technique allows you to replace soundbites in your sequence, with audio files/soundbites already loaded in the project’s Audio Files folder. This technique avoids having to manually search your hard drive as discussed previously, and gives you direct access to the audio files already in use in your project.
There are two methods for doing this:
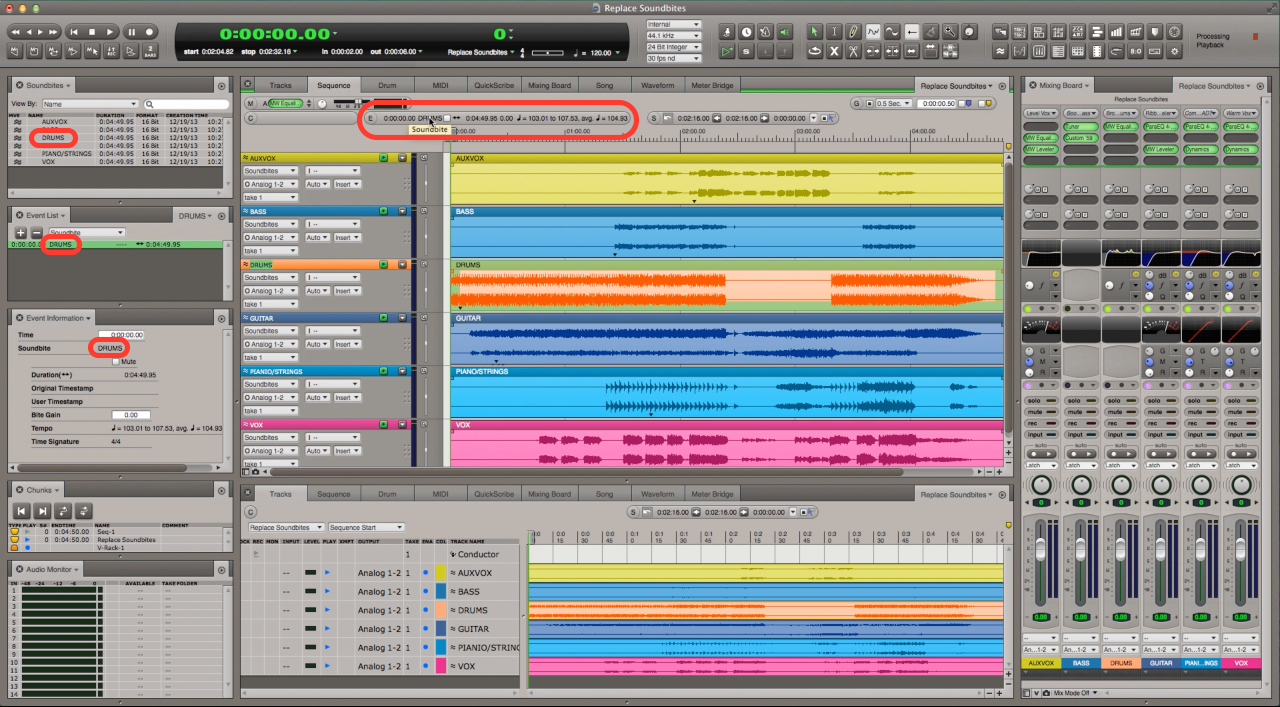
- Open the Event List, and using the Window Target menu on the top right, choose the audio track which has the soundbite you want to replace. Control/Win-double-click the soundbite’s name to pull up a list of soundbites already in this project. Click the desired soundbite and click OK.
- Highlight a soundbite in the Tracks or Sequence Windows, and in the Event Information Bar, single click on the soundbite name. The same list of previously added soundbites will appear, allowing you to highlight the desired soundbite and click OK. Be sure to enable the Event Information Bar for your edit window via the Information Bar preferences page.
Note: You may need to position the Wiper in your sequence before the time/location of the original soundbite, otherwise, it may not be visible in the Event List.
Want to see your tip as a MOTU Tech Tip? Is there a feature, technique, or configuration you would like to learn more about? Send us your tips, or topic suggestions »